

During the finishing phase at Lumina Retreat Villa, 3A Signature oversees every step of the tile installation process from laser-guided axis positioning, adhesive preparation, and precise tile alignment to the final inspection of grout lines and surface quality. The procedure focuses on maintaining strict verticality, alignment, flatness, and robust bonding between the tiles and the substrate, thereby ensuring an optimal foundation for subsequent finishing work.
Technical Quality Control for Wall Tiling During the Finishing Phase
For villa renovation and finishing projects like Lumina Retreat Villa, wall tiling must be closely coordinated with masonry and plastering work, concealed MEP (mechanical, electrical, and plumbing) systems, and specific architectural details. Tiled surfaces must meet strict requirements regarding geometry, bond quality, and uniformity across individual tiles. This is particularly critical when using large-format tiles, as any deviation in the placement of the first tile can compromise the entire finished surface.
Consequently, the tiling process at Lumina Retreat Villa follows a rigorous inspection sequence from the substrate (wall surface) to the final installed finish. The technical team utilizes laser levels, notched trowels, and tile leveling systems to ensure precise positioning, consistent adhesive distribution, and a perfectly flat, uniform surface. Critical areas such as corners, edges, utility connection points, and grout lines are thoroughly reviewed before proceeding to the next stage of construction.
Laser-Guided Positioning of Grids and Tiles
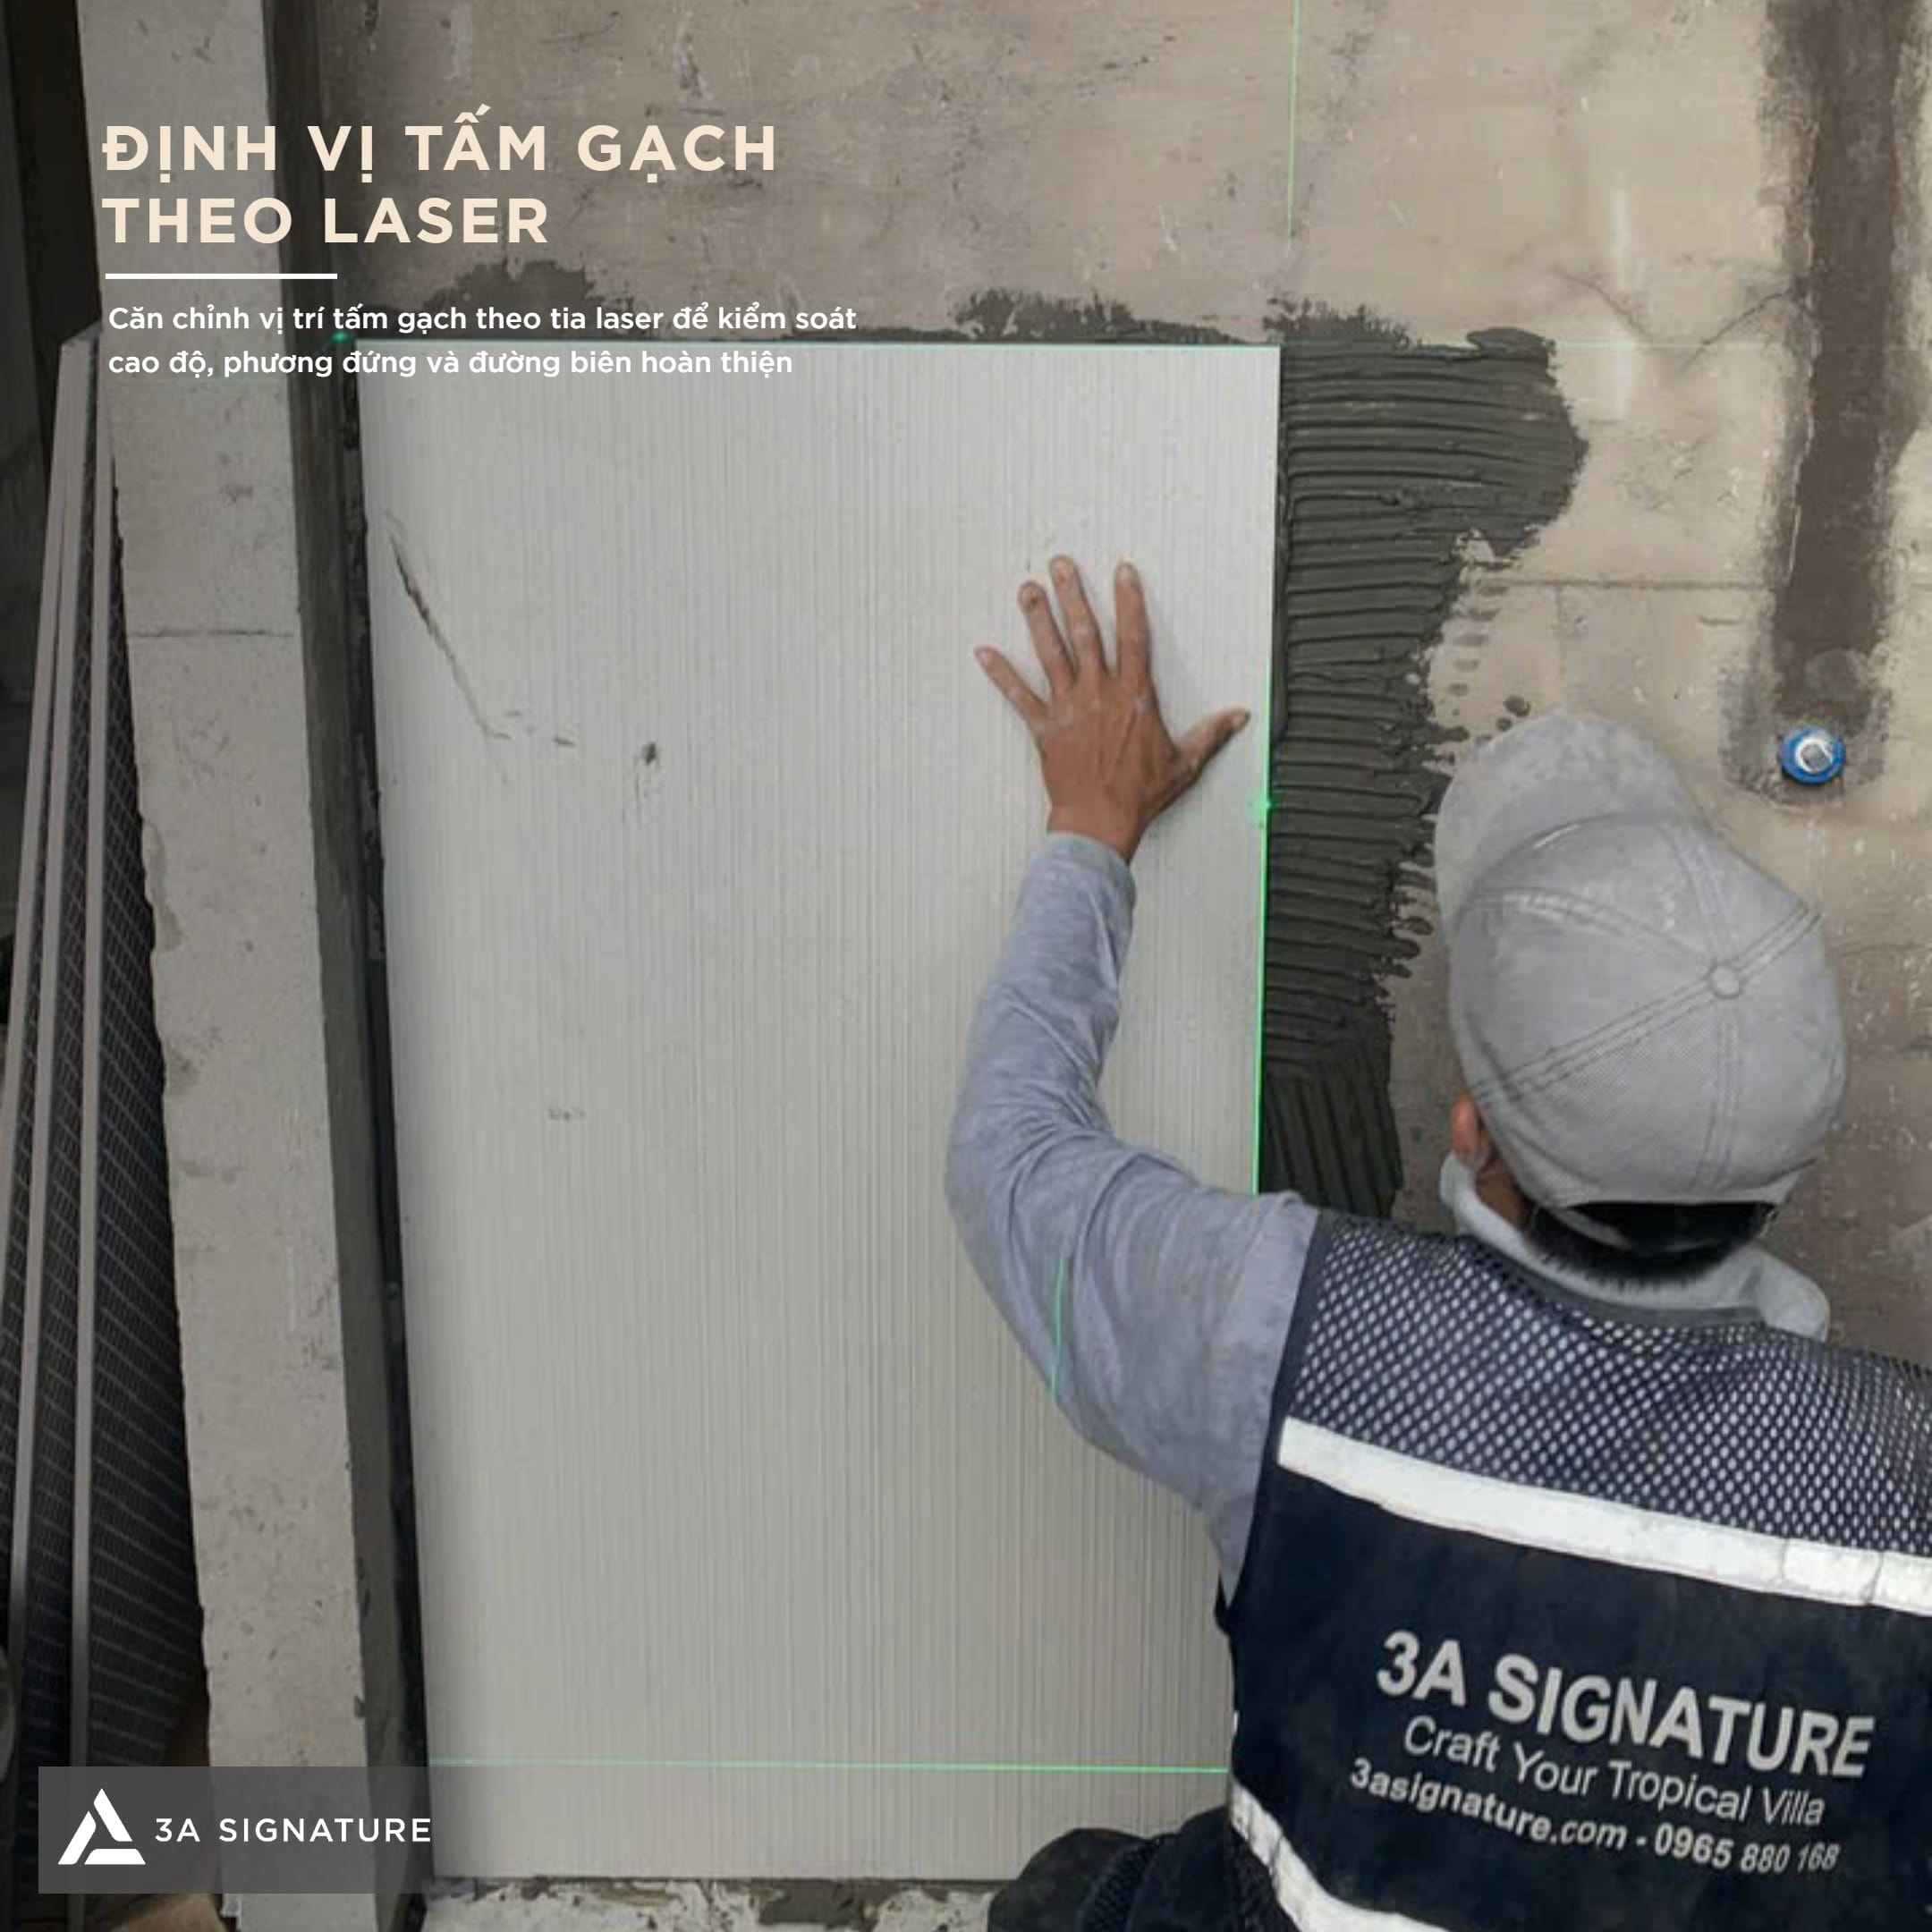
Prior to installation, the technical team consults the blueprints to determine the orientation, elevation, reference lines, and starting point for each section of tiling. A laser level is used to establish horizontal and vertical reference lines, ensuring precise alignment of the tiles throughout the installation process. Selecting the position for the initial tile requires careful consideration of the wall dimensions, the placement of openings (such as doors or windows), terminal edges, and the overall layout of the remaining tiles.
For the tiling work at Lumina Retreat Villa, laser-guided positioning is essential for minimizing cumulative deviations. Once the first tile is accurately aligned, it serves as a reliable reference for maintaining consistent grout lines and vertical orientation for all subsequent tiles. The installation team also verifies the spacing relative to wall edges and MEP (mechanical, electrical, and plumbing) connection points, helping to avoid the need for adjustments or cuts in highly visible areas.
Checking Elevation and Vertical Alignment During Panel Installation
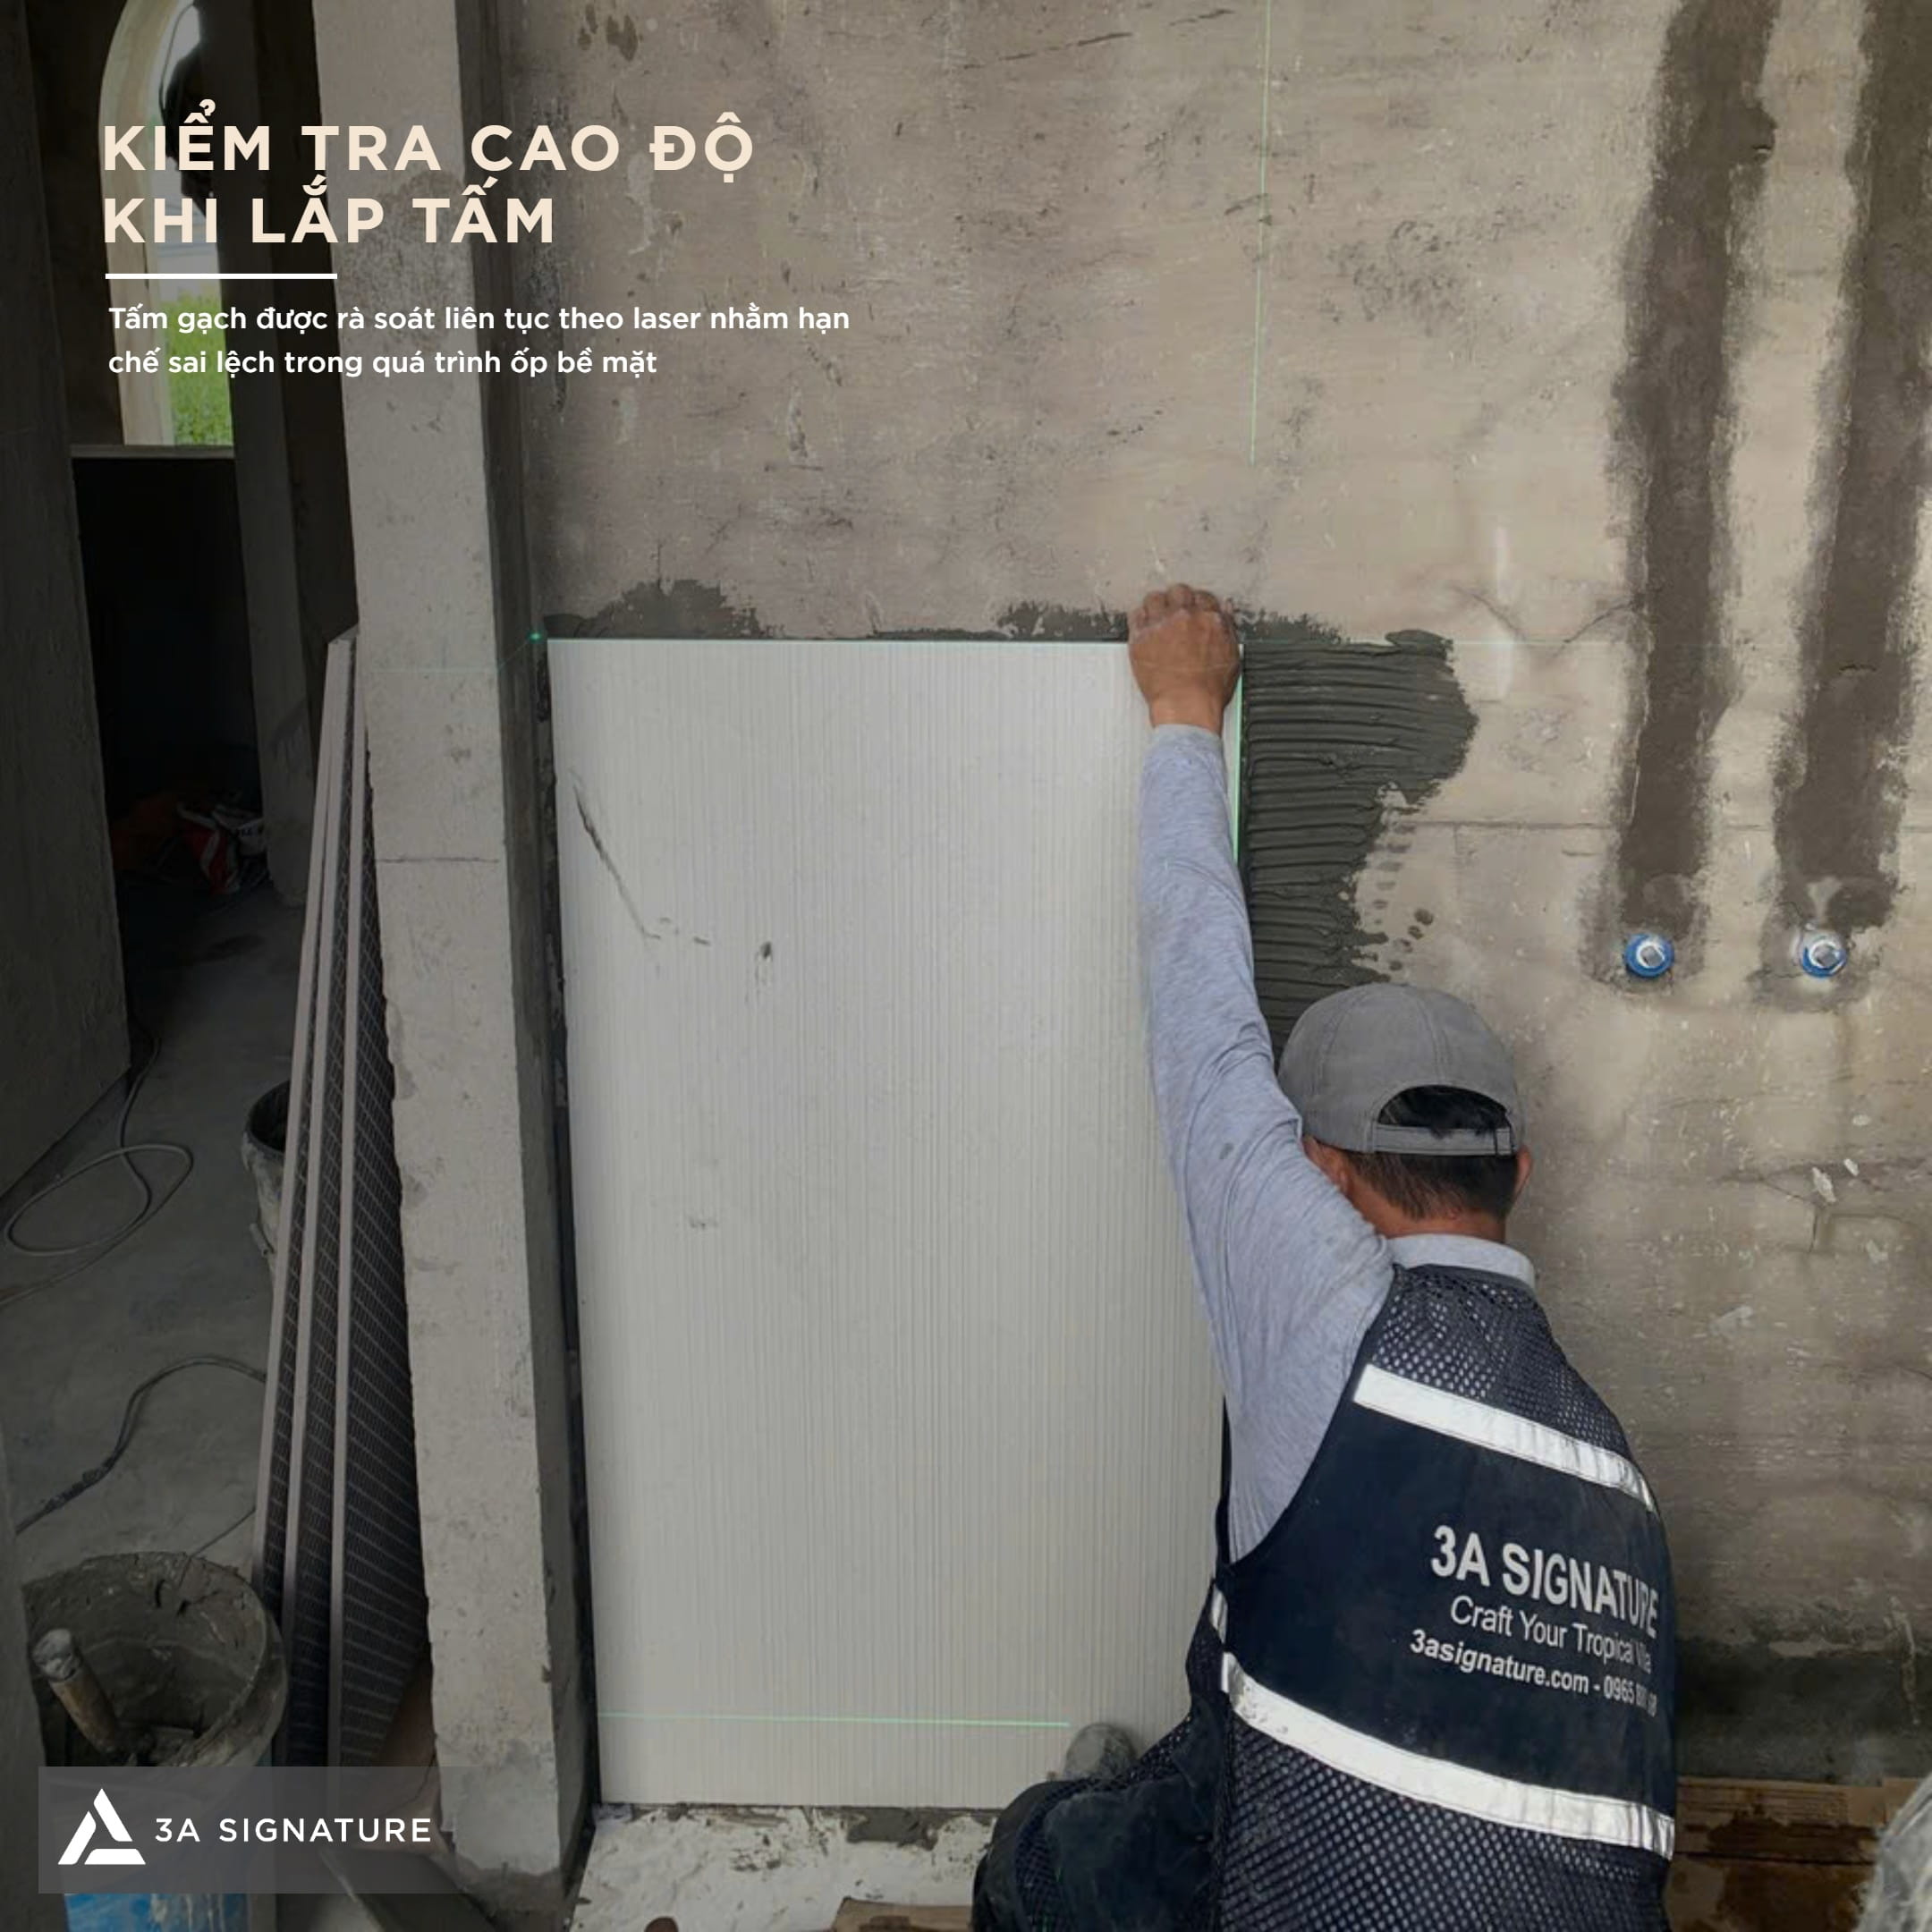
Once the reference lines are established, each panel is placed into position and aligned according to the defined grid. For wall cladding, vertical alignment must be monitored in conjunction with the positioning of panel edges, grout lines, and the final finished surface plane. These checks are performed continuously throughout the installation process, rather than waiting until the entire tiled area is complete.
At Lumina Retreat Villa, the technical team utilizes laser lines as a benchmark to verify the positioning of each panel. Any deviations must be corrected while the adhesive is still within its workable time frame. Ongoing inspection helps prevent issues such as misalignment, uneven grout lines, or an uneven surface particularly in high-cladding areas, narrow wall sections, and junctions where the cladding meets other structural elements.
Adhesive Layer Control and Adhesion Strength
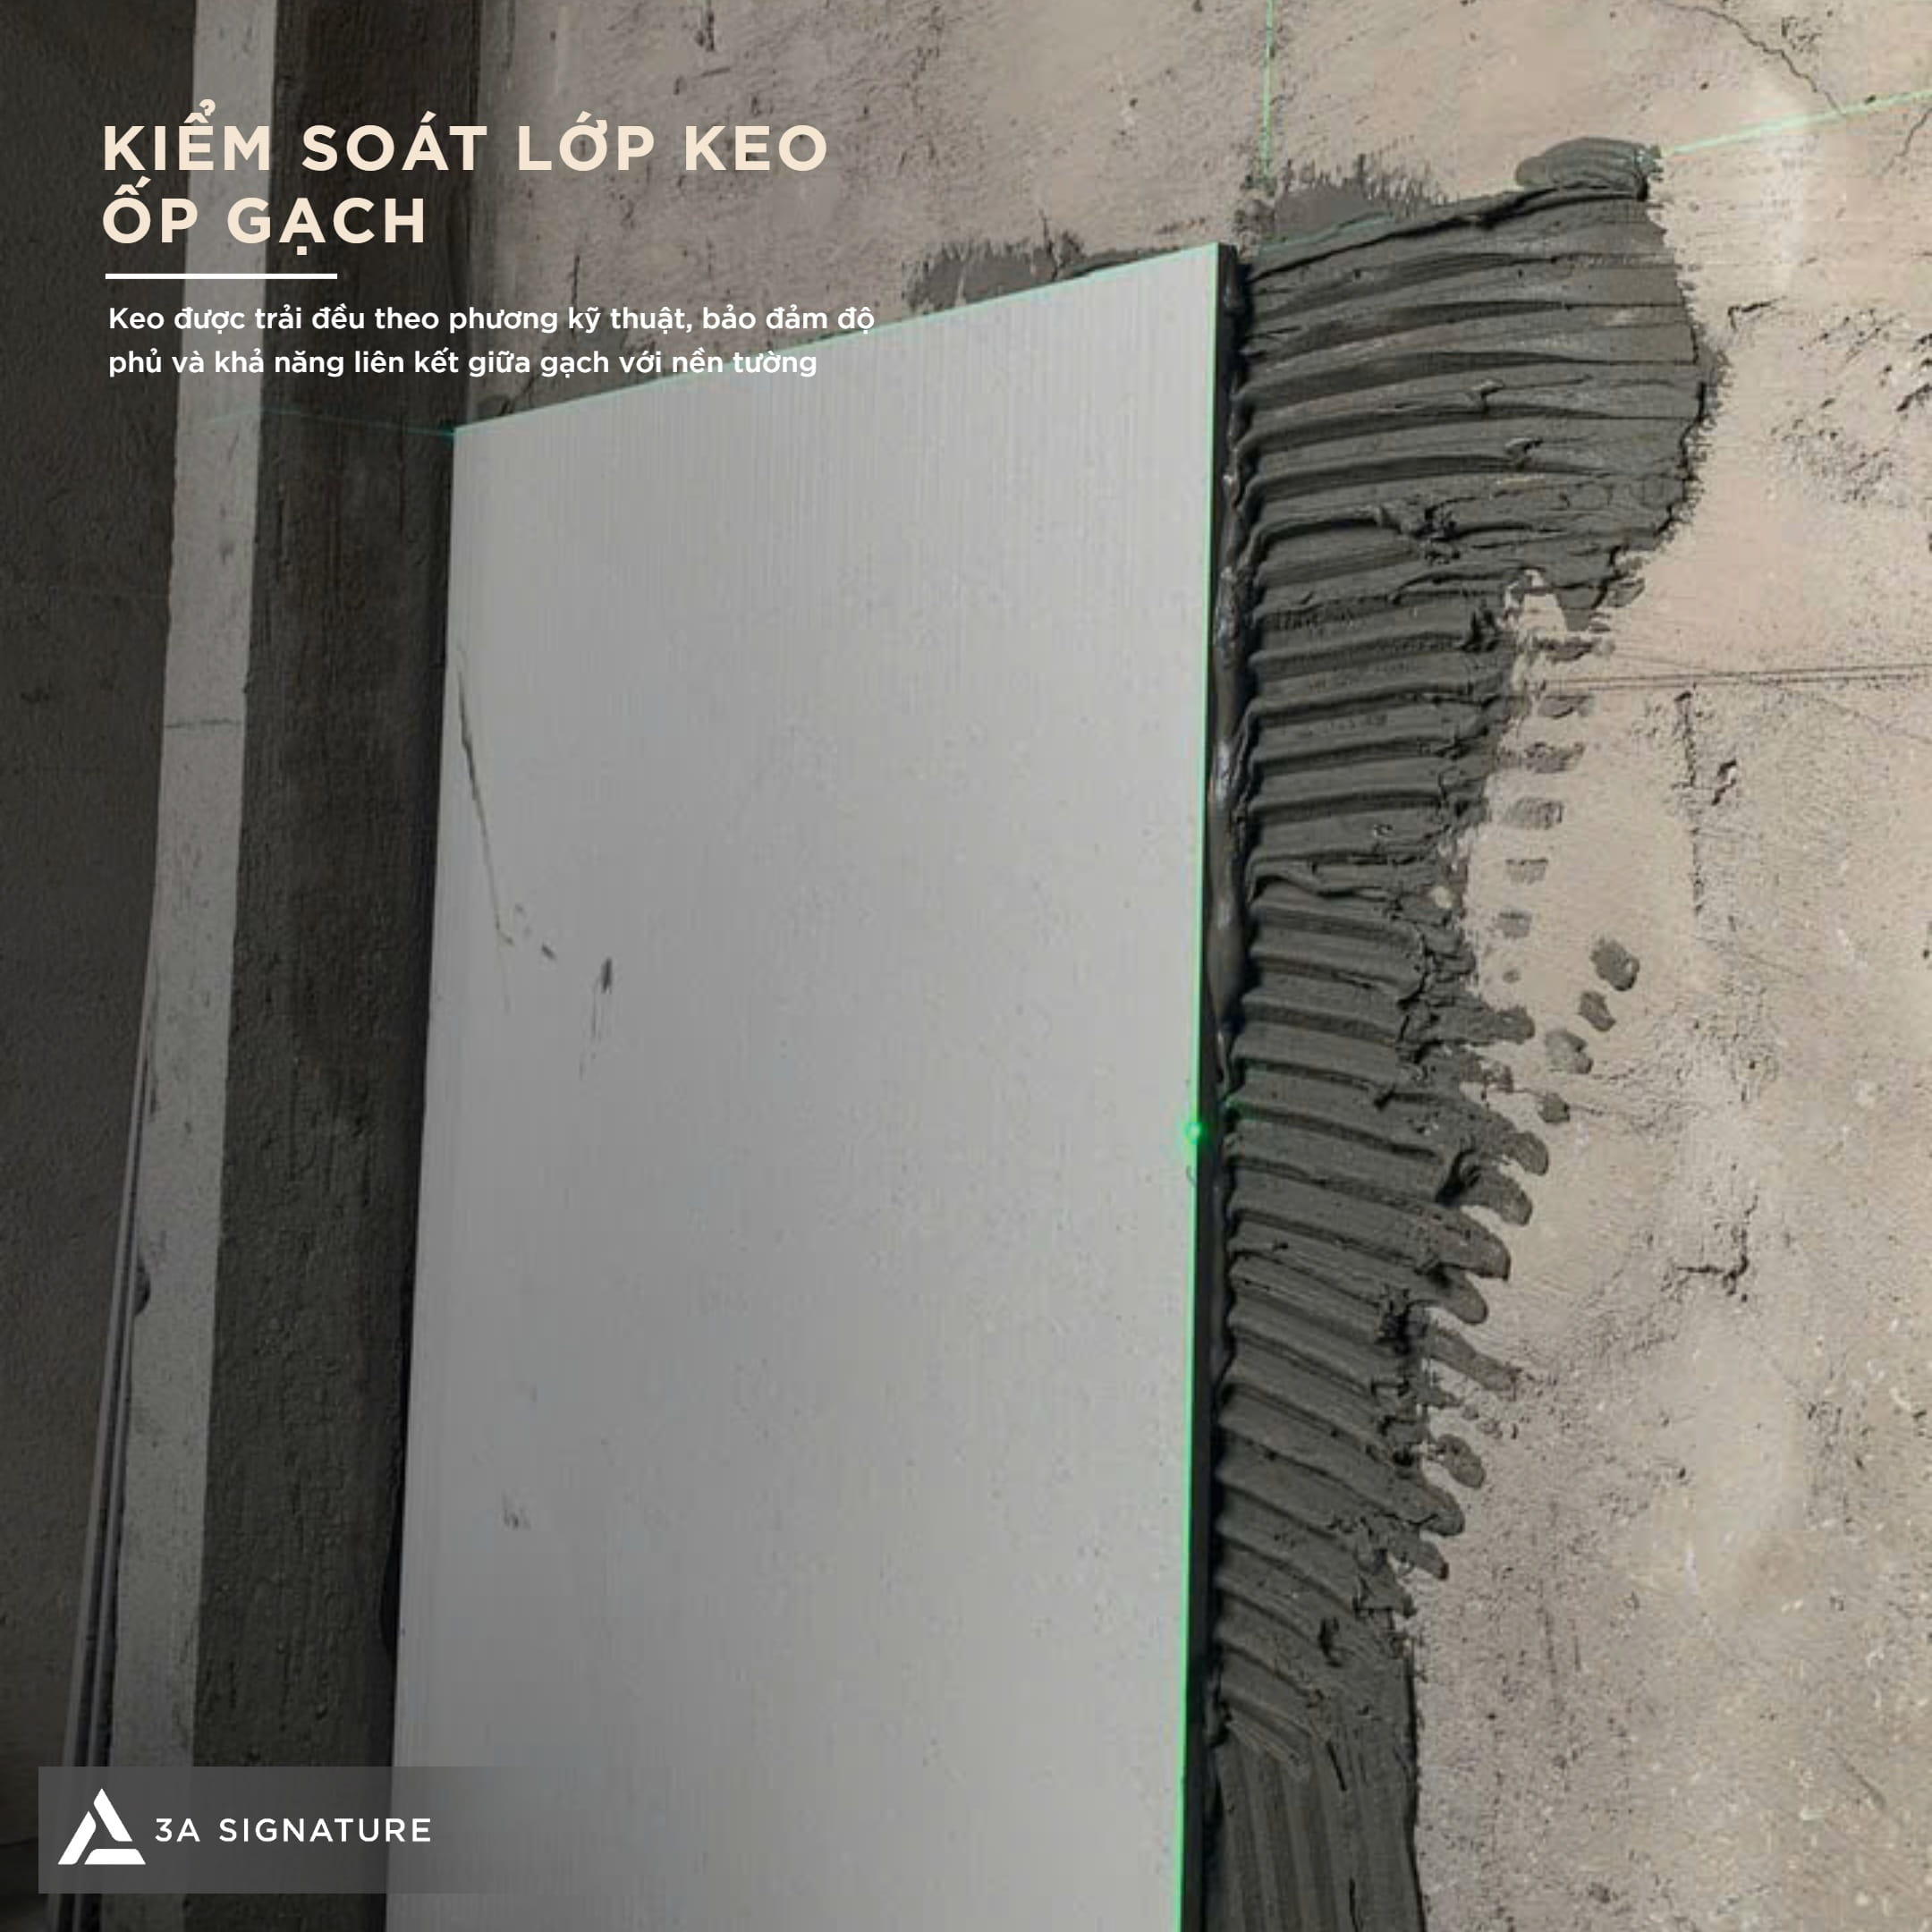
The quality of the adhesive layer directly influences the bond between the tile and the wall substrate. During the tiling process at Lumina Retreat Villa, the application of the adhesive must be carefully managed taking into account the condition of the substrate, the uniformity of the adhesive layer, and adherence to the manufacturer’s specified working time. Before tiling begins, the wall substrate must be inspected for stability, flatness, and cleanliness, with particular attention paid to any areas that could compromise adhesion.
A notched trowel should be used to create consistent adhesive ridges, ensuring the material is evenly distributed beneath the tile. For large-format tiles, the installation method must guarantee adequate adhesive coverage, minimizing any voids behind the tile. The technical team must pay special attention to the edges and corners of the tiles, as well as areas where utility lines are embedded within the wall. The adhesive layer must be verified before proceeding with the installation of subsequent tiles.
Aligning Grout Joints and Surface Evenness with a Leveling System
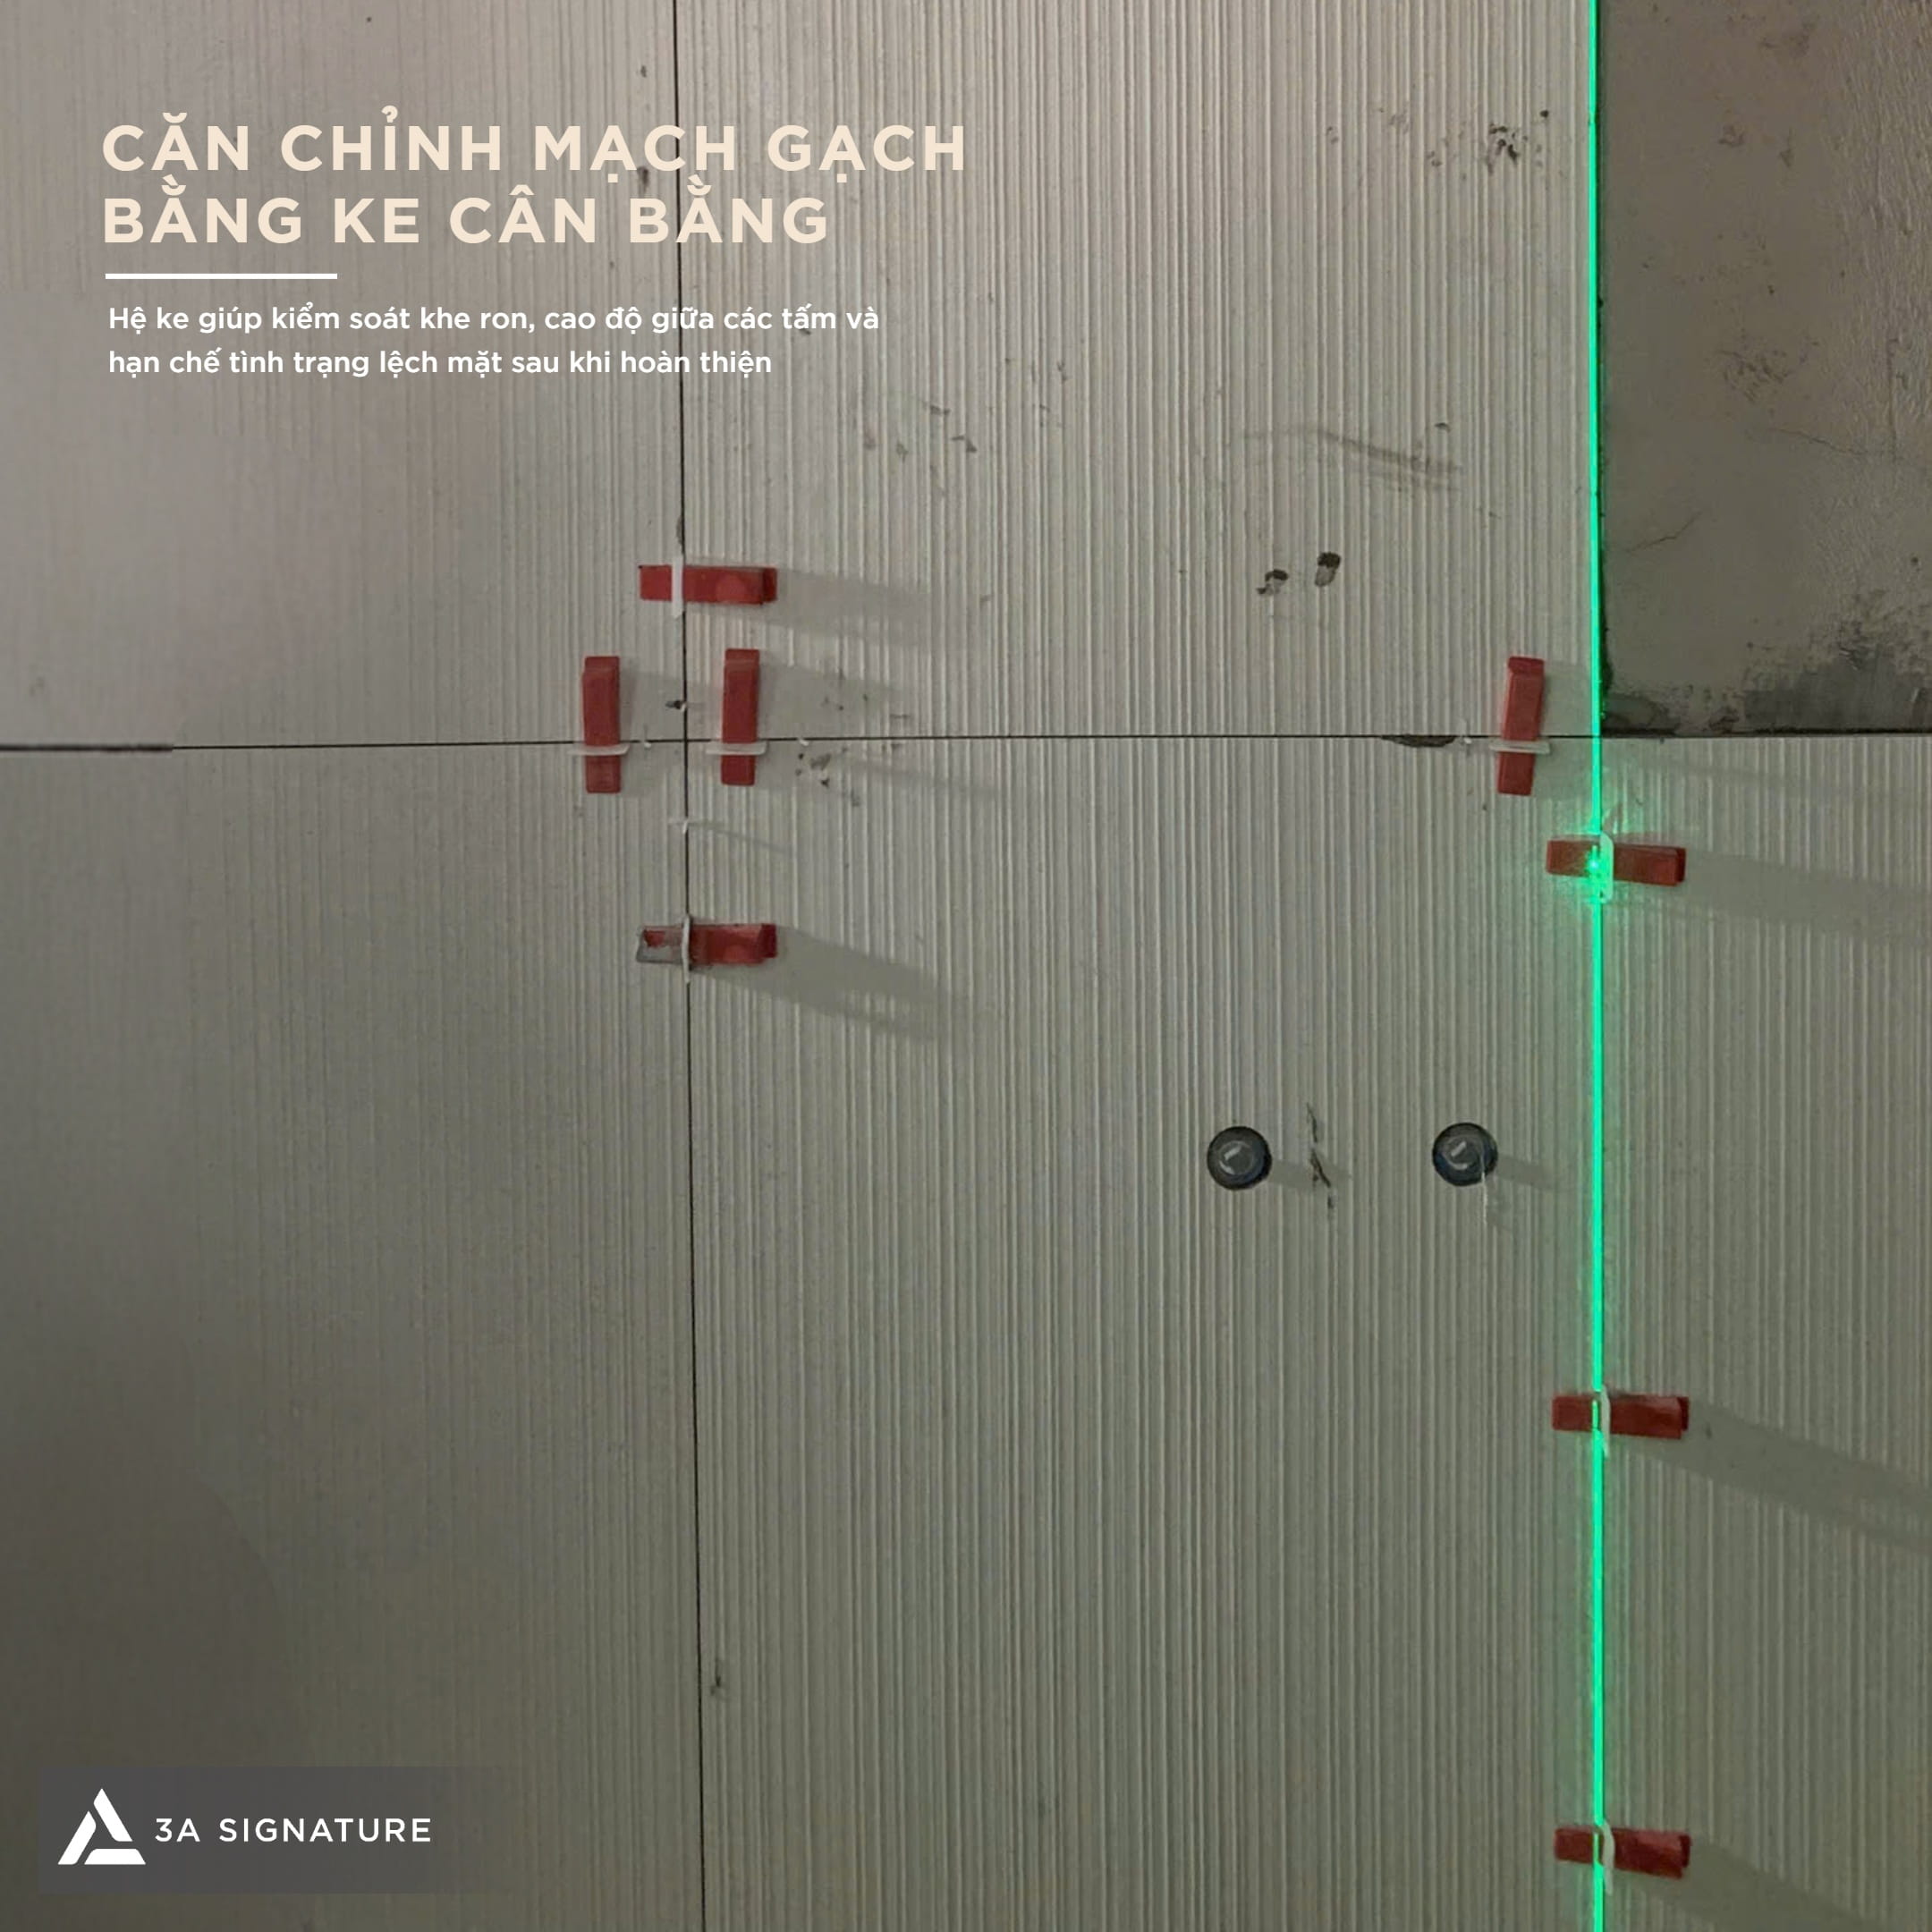
Following the initial placement of tiles along the designated reference lines, a leveling system is employed to manage height discrepancies between the edges of adjacent tiles. This is a critical step in the tiling process for Lumina Retreat Villa particularly when working with large-format tiles, where even minor surface irregularities can become highly visible under oblique lighting.
Grout joint spacing must be maintained in strict accordance with the project drawings and material specifications. While the leveling system helps mitigate surface unevenness, it is not a substitute for proper substrate preparation or initial flatness verification. Throughout the installation, the technical team continuously monitors the intersections of the grout joints, checks both horizontal and vertical alignment, and ensures uniformity across the tiles to maintain a seamless, cohesive layout.
Completing Tiling Sections by Zone
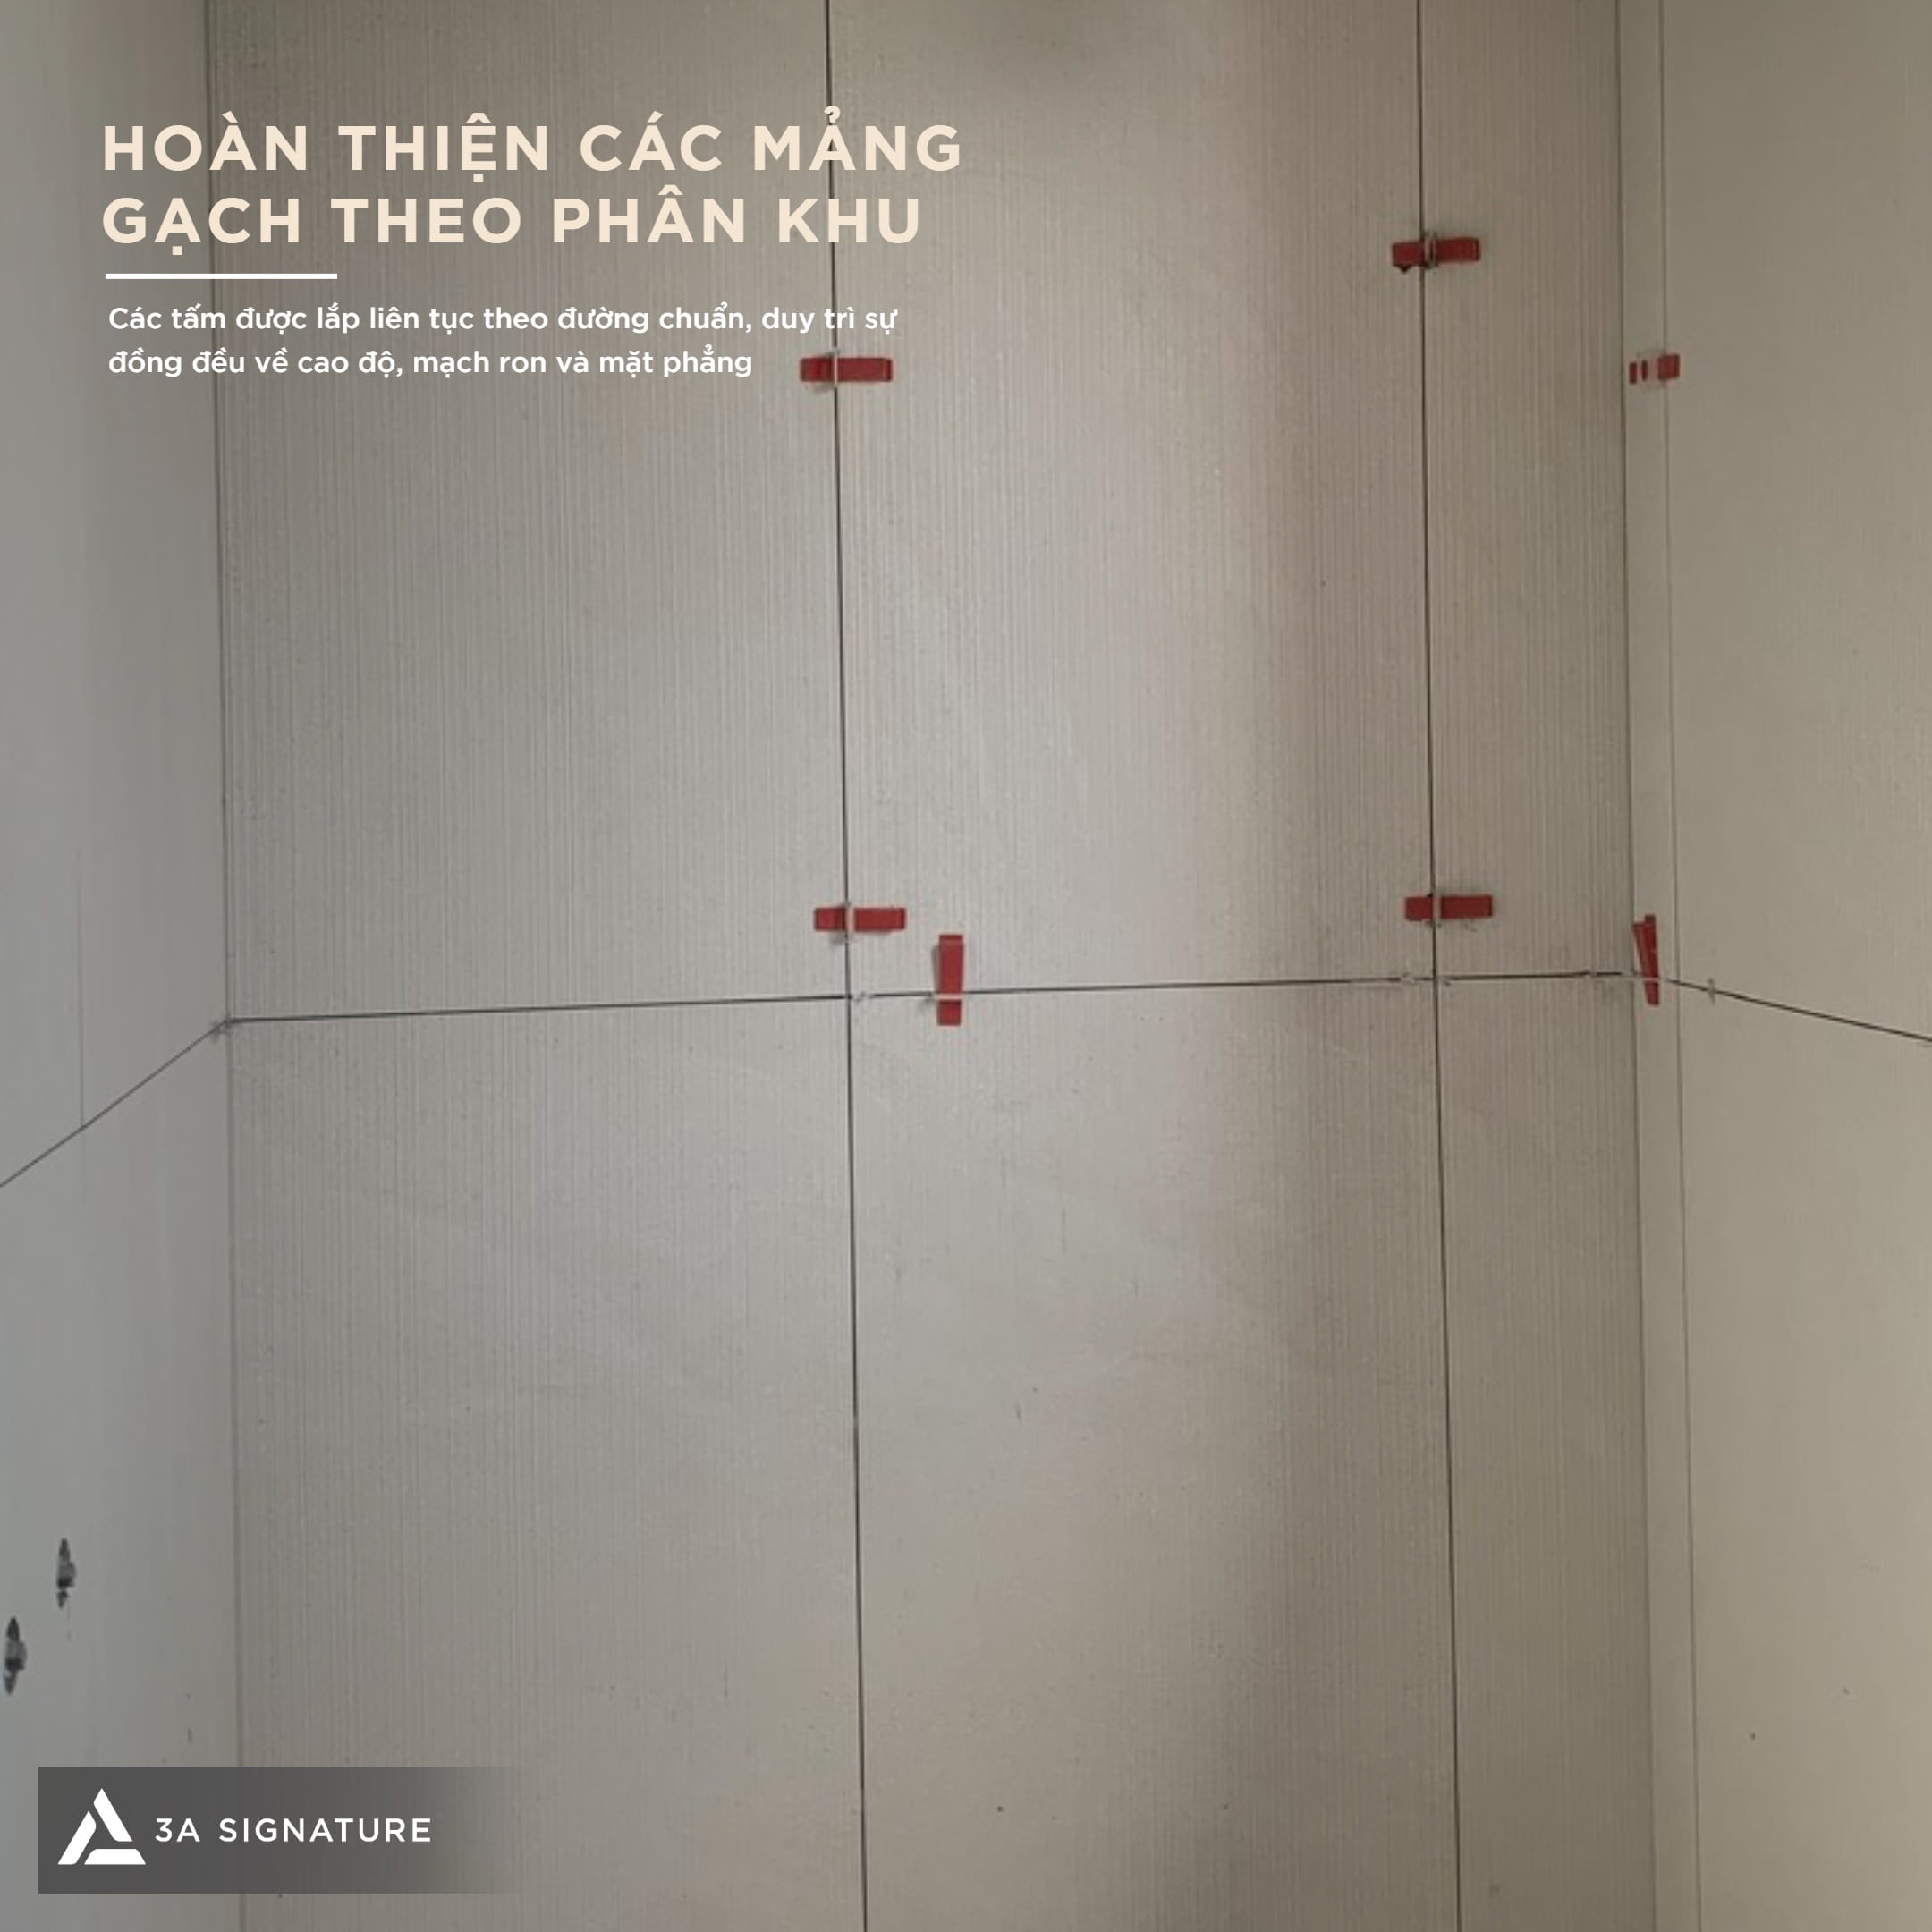
Once the initial tiles have been aligned, the tiling process proceeds section by section. The installation sequence must align with the site layout, the tile grid plan, and the locations of pre-installed utility connections. For wall sections with numerous technical intersections, completing the work zone-by-zone allows the team to better manage grout lines, tile edges, and the overall continuity of the surface.
For the tiling work at Lumina Retreat Villa, tiles featuring specific patterns or veining must be arranged in accordance with the approved design scheme. Beyond aesthetics, technicians must verify grout joint widths, surface flatness, and the integrity of the bond for each tile. In areas involving electrical outlets, utility conduits, or recessed fixtures, dimensions must be cross-checked beforehand to minimize the need for adjustments or cutting after installation.
Controlling Intersection Angles and Finishing Boundaries
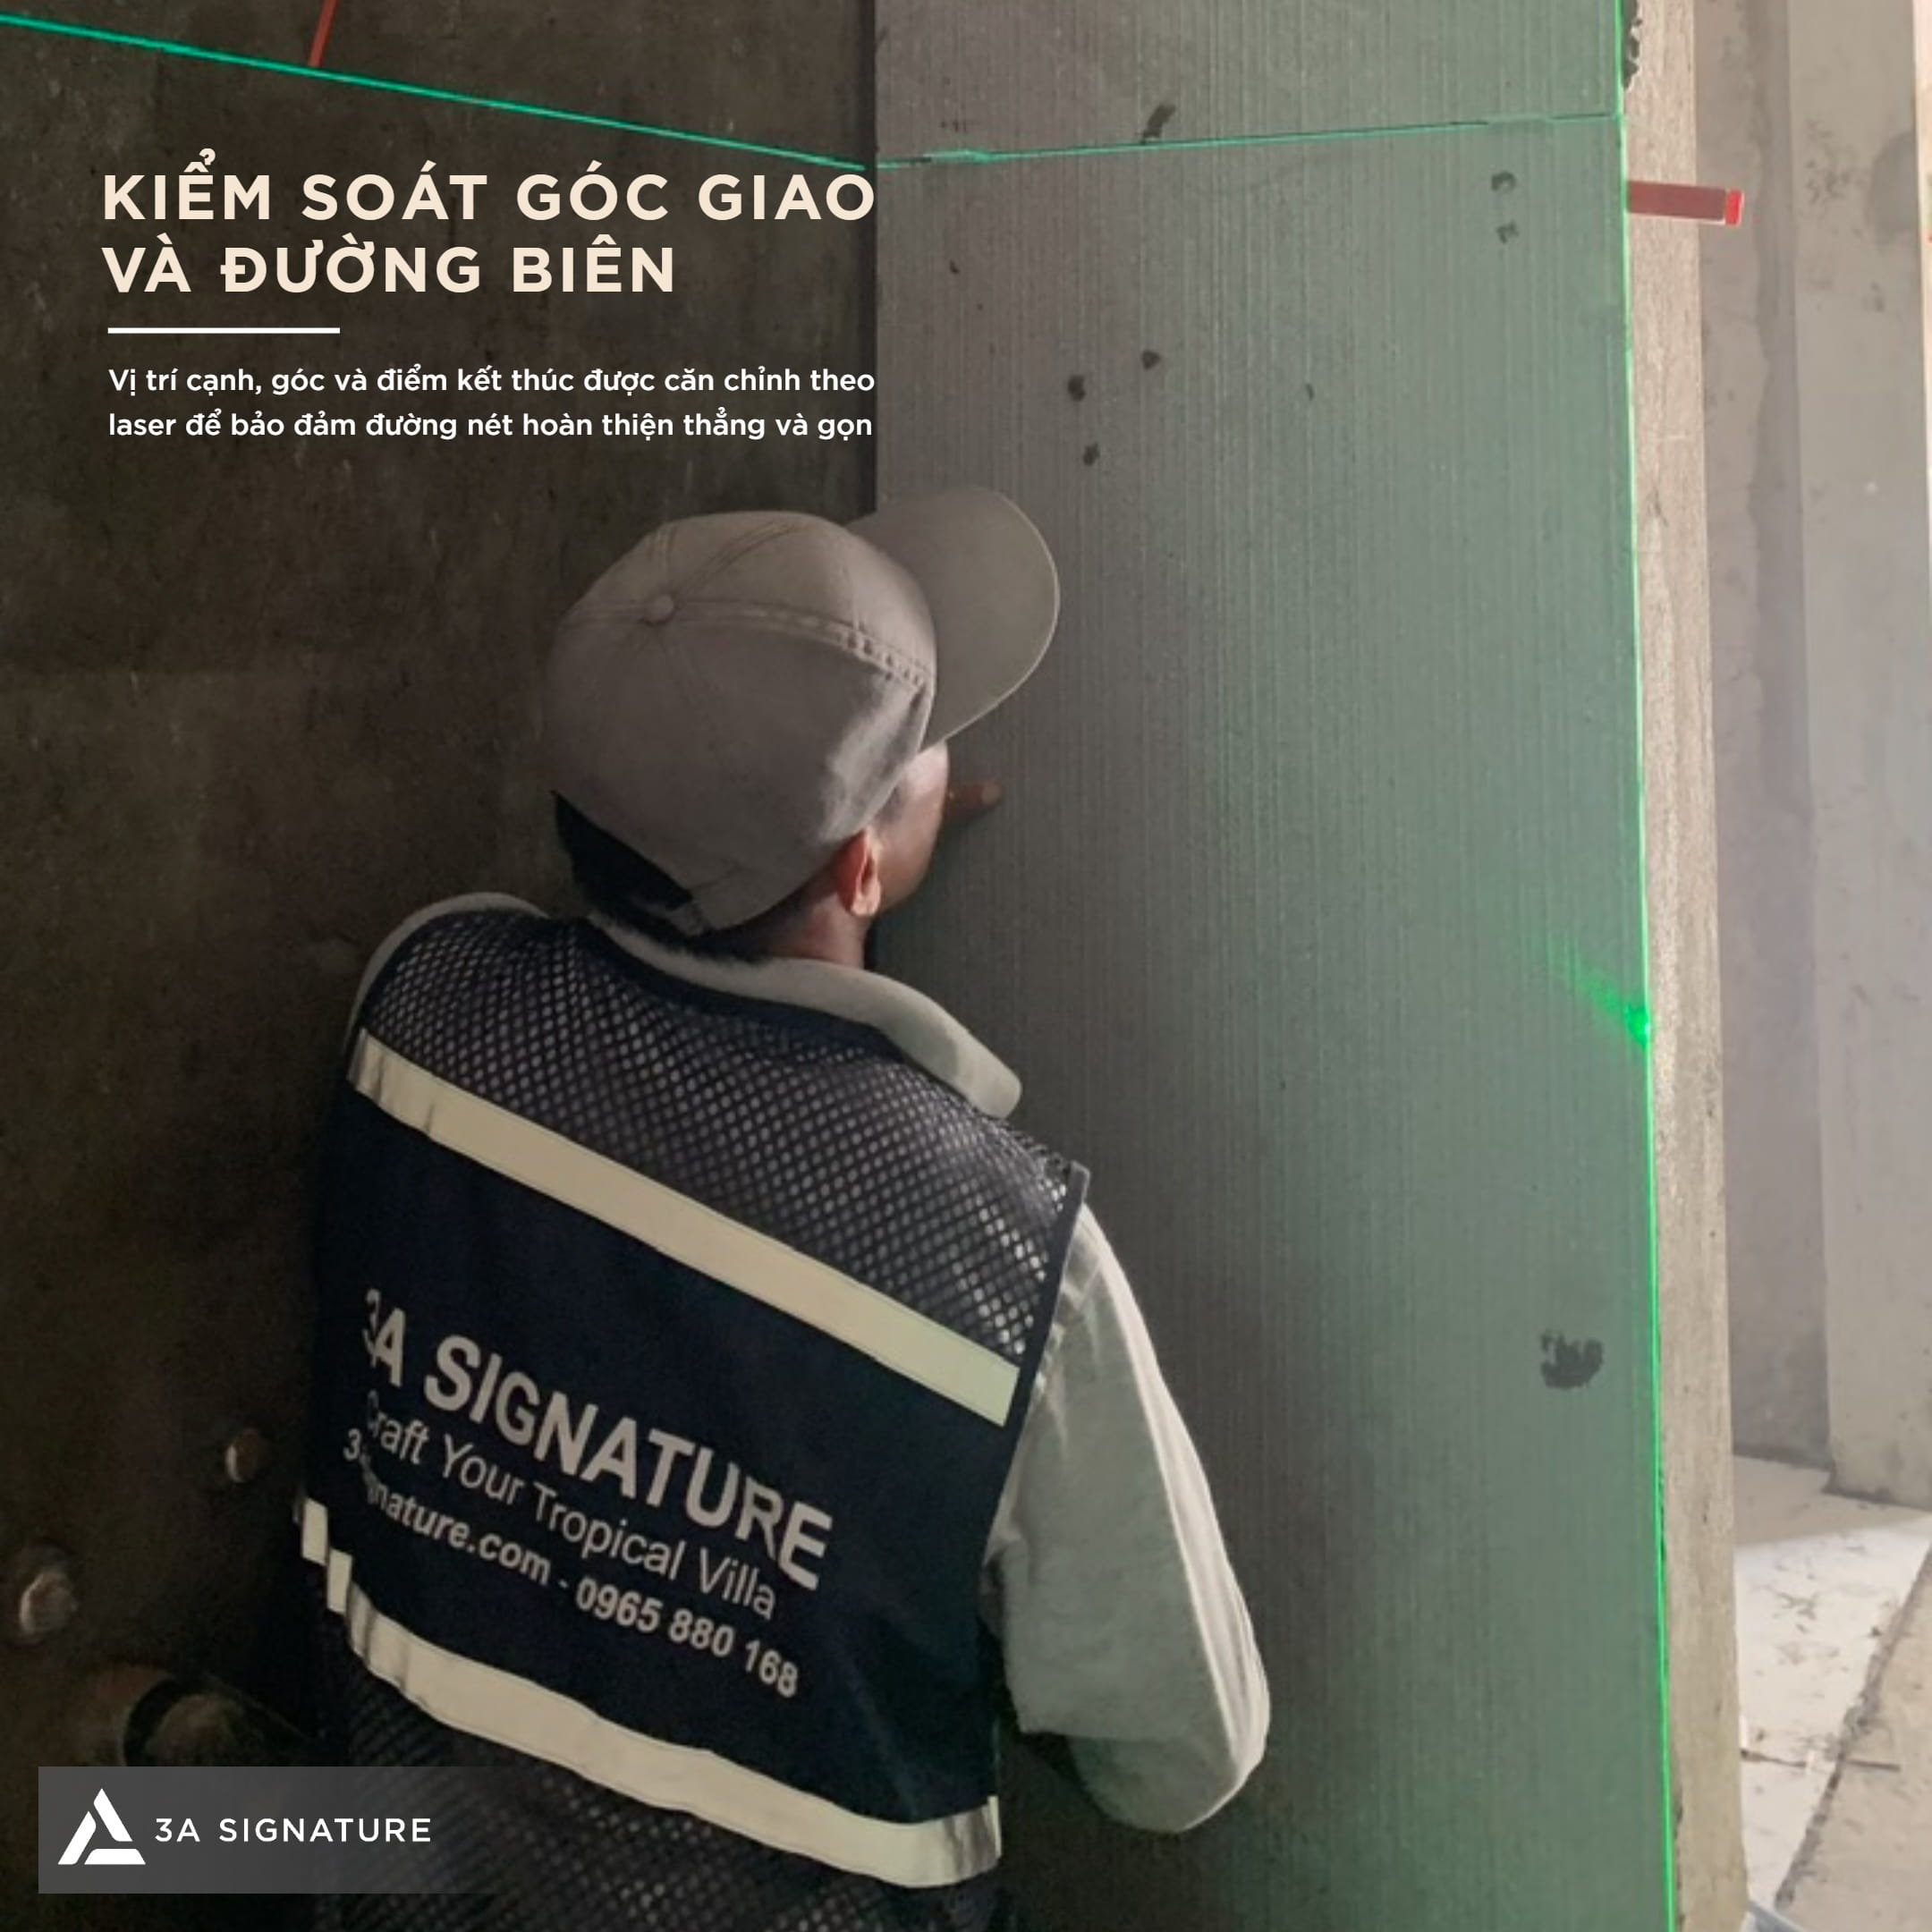
Corner, end, and junction locations often require a higher level of control than the mid-wall area. These are the points where errors in straightness, clearance and continuity of lines can easily appear. For large-format tiles, an improperly aligned end edge can affect the relationship between the panel and the door, wall or installation.
The technical team at Lumina Retreat Villa uses lasers to check the vertical direction of the boundary, combined with checking gaps at adjacent locations. Cutting edges should be treated in accordance with design details and material requirements. Controlling the intersection angle must also take into account transition or displacement gaps at necessary locations, avoiding hard treatment of points with specific structural requirements.
Surface Inspection Following Installation and Prior to Grouting
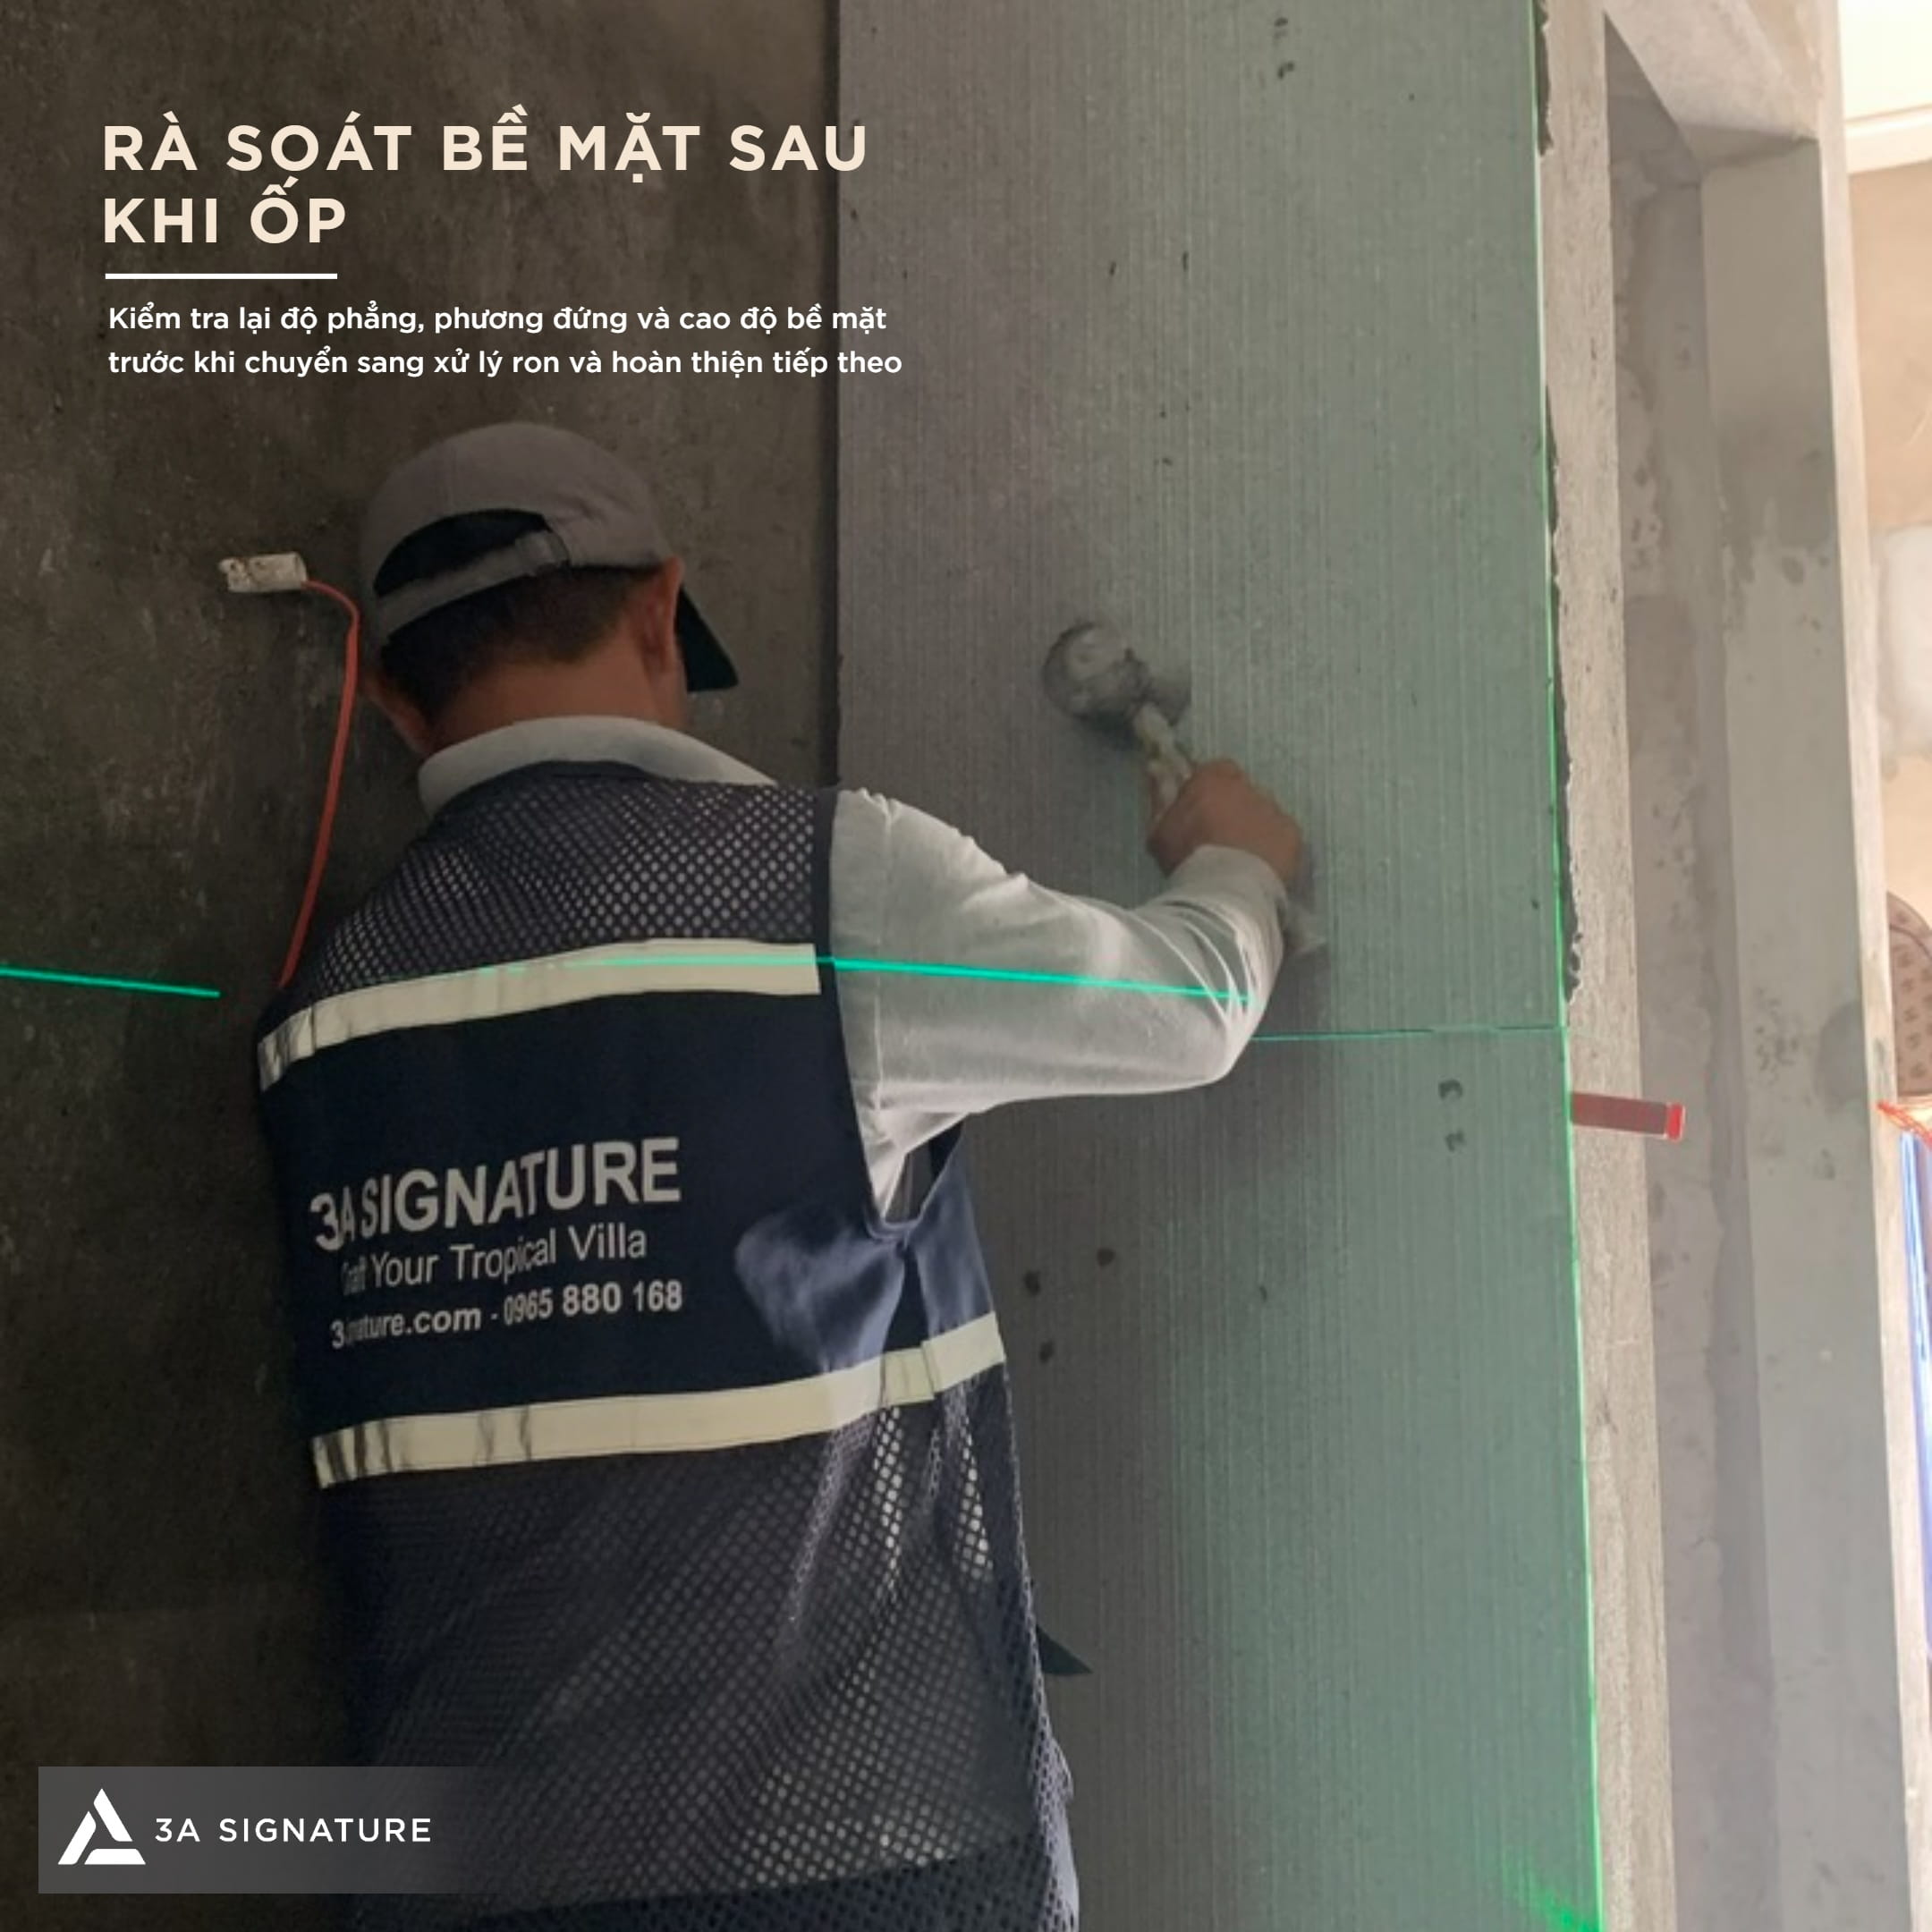
Once the tiles have been installed, the surface must be inspected for flatness, vertical alignment, elevation, and the condition of the grout joints. This is a critical step in the tiling process for Lumina Retreat Villa, as it allows for the identification of any irregularities before proceeding to grouting. Any surface deviations, inconsistent grout joints, or tile edges that do not meet specifications must be evaluated, with appropriate corrective measures determined and applied.
The inspection also encompasses checking areas designated for fixtures, terminal edges, and the removal of excess adhesive from within the grout joints, in accordance with technical requirements. The removal of the tile leveling system and the application of grout should only take place once the adhesive has cured in compliance with the manufacturer’s instructions. This ensures that the tiled surface is properly prepared for the final finishing stages and subsequent inspection and handover.
Conclusion
The tiling work at Lumina Retreat Villa is a finishing process that requires the coordination of design, construction techniques, and actual site conditions. From establishing laser reference lines, managing the adhesive layer, and aligning grout joints to verifying surface flatness and corner junctions every step directly influences the quality of the final surface.
At 3A Signature, technical oversight is maintained throughout the entire construction process, ensuring that the tiled surfaces meet design specifications and are ready for subsequent finishing stages.